
If you’re a fibre optic contractor, it is likely that your splicing machines are your pride-and-joy, religiously cleaned and maintained on a daily basis. N0?!? Well, they should be.
Too often I have seen contractors leave their machines open to the elements, generally leaving them dirty, and then blame the machine when arcs leave splices looking horribly deformed and with well over 0.05db losses. A lot of the time, both electrodes and the machine’s health in general can benefit from regular maintenance, and you don’t need to be an incredible technician either.
Cleaning a Splicing Machine
The best way of learning how to maintain a splicing machine is to regularly clean the splicing machine. But you won’t need to break out the water bucket and soap – leave those very far away.
Make sure that you get yourself a microfibre cloth. Microfibre cloth will not leave lint residue when wiping a surface, so this makes it incredibly useful when cleaning the interior and exterior of a splicing machine. You will also require fibre optic alcohol. However, if you aren’t interested in purchasing expensive ‘fibre’ variants of cleaning alcohol, then make sure you buy a bottle of 99% Isopropyl from any other technical retailer. Isopropyl is also used to clean computer accessories and parts, so it is widely and cheaply available.
- Make sure that you apply enough isopropyl to the microfibre cloth so that when you wipe with the cloth it is damp enough to clean, but it must not allow any alcohol to pool up in recesses in the machine.
- Using this measure you can literally clean every part of the machine, both on the exterior and interior, NB: apart from the electrodes and the camera lenses within the splicing machine. We recommend cleaning the interior before the exterior so as not to transfer any dirt into the machine.
- Use a small cotton earbud with isopropyl in order the get any hard-to-reach places in the machine. Use this method to clean the camera lenses, but ensure that you are using a brand-new, clean earbud for each lens, and apply less alcohol. Rub the lenses softly in a circular pattern.
Get yourself a high-quality, soft-bristle paintbrush. It needs to be high quality so that it doesn’t lose any bristles in the machine. A soft-bristle paintbrush can be used to clean the fusion splicing machine’s V-groove (where the fibre sits before splicing) as well as the heating tray (where the heat shrinking of the protector takes place). This is how you can remove dust and tiny pieces of debris within the machine more regularly. Regular cleaning; that’s how to maintain a splicing machine.

Cleaning & Maintaining Electrodes
Electrode maintenance is crucial if you intend on ensuring perfect splices. No matter the splicing machine, if the electrodes are clean and able to project a perfect arc, then the splice will be good.
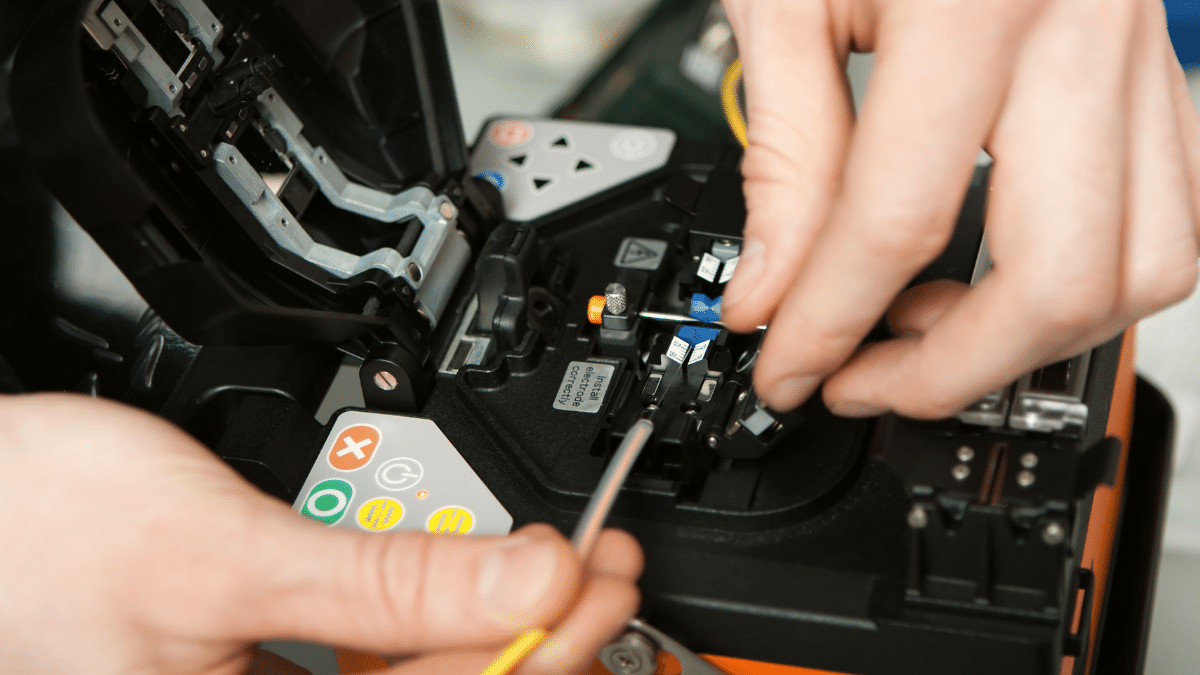
Almost all electrodes are installed by a screw-clamp within the machine. This makes removing the electrodes easy. Your machine might require another action when removing or replacing electrodes, so make sure you know what you’re doing before-hand. Additionally, some official resellers of electrodes might rescind your warranty if you remove or replace electrodes yourself, so only perform this action if you are completely sure you are able to.
When you remove the electrodes they can be cleaned with alcohol and a microfibre cloth. Please make sure that you use a limited amount of isopropyl because if there is any residue of alcohol on the electrode when you arc, you can re-burn the electrode and therefore re-dirty the electrode.
PS: here’s a little trick. Place a formula of a teaspoon of baking soda and a teaspoon of salt diluted in warm water into an aluminium container. Place the electrodes in the formula for a few hours, and then take them out before wiping them clean as above. This will remove all the oxidation stains on the electrodes, giving them some more life. I have used electrodes for over 5000 splices using this method of cleaning. Learning how to maintain a splicing machine sometimes requires a few tricks.

Calibrate Your Fusion Splicing Machine
And then calibrate your machine again, and again, and again. You cannot calibrate your machine too often. A good rule-of-thumb is to calibrate the splicing machine at the beginning of each new day of splicing, and then recalibrate in the same day after 100 splices (if you’re splicing often ie. in trays), or halfway through the working day (if you’re splicing outside in joints and terminations). This is because of a number of factors:
- Temperature and humidity changes during the day can result in your machine using the same measurements for splicing in the morning as in the afternoon… when this shouldn’t be the case. Make splicing machine calibrations as temperature and humidity changes.
- Your machine is running hotter and/or there is dirt and residue from the day’s operations, changing the temperature and profile of the arc. Therefore you will need to recalibrate your splicing machine.
By not recalibrating your machine, you or your technicians will need to do more splicing, which will gradually result in more wear-and-tear on your machine, and a valuable loss in time on the job.
Enjoy working with a well-maintained fusion splicing machine. If you keep your machine clean, the electrodes in tip-top shape, and you ensure that calibration is done regularly, you’ll be splicing sub 0.01db most of the time. And that, ladies and gentlemen, is how to maintain a splicing machine.
Remember, if you need splicing machines, then don’t hesitate in visiting HeaviTech’s splicing machines for sale page. We can supply you and your business with Sumitomo, Fujikura and Comway (or any other brand that you might need).
